- Introduction to PHP Programming
- A Step-by-Step Guide to Installing PHP on macOS
- The Fundamentals of PHP Syntax
- A Comprehensive Guide to PHP Data Types
- Exploring PHP Superglobal Variables: A Comprehensive Guide
- Understanding PHP Operators: A Comprehensive Guide
- Mastering Conditional Statements in PHP: A Beginner’s Guide with Examples
- Exploring Loop Statements in PHP
- Form Handling in PHP: A Step-by-Step Guide with Examples
- Understanding PHP Arrays: A Comprehensive Guide
- Exploring PHP Built-In Functions
- Exploring User-Defined Functions in PHP
- Demystifying Scopes in PHP: A Practical Guide
- Understanding PHP Constants: Unchangeable Data for Reliable Code
- A Guide to PHP Classes and Objects: Building the Foundations of Object-Oriented PHP
- Creating Databases with PHP and MySQL: A Beginner’s Guide
- Connecting to a MySQL Database with PHP: A Step-by-Step Guide
- Connecting and Inserting Data into a MySQL Table with PHP
- Updating and Deleting Data in a MySQL Table with PHP
- PDO in PHP: A Better Way to Create, Read, and Update Data
- Fetching and Selecting Data in MySQL Using PHP with PDO
For web developers aiming to create and test PHP applications within a local environment, the installation of PHP on macOS becomes a fundamental step. This comprehensive guide is designed to lead you through the entire process of setting up PHP on your macOS system, guaranteeing a seamless configuration tailored to your development requirements.
Step 1: Check Your macOS Version
Prior to starting, it’s important to confirm your macOS version. The steps for installation could exhibit slight differences depending on the specific version of your operating system. Locate your macOS version by clicking the Apple menu positioned in the upper left corner of your screen, then proceed to select “About This Mac”. The Os used for this tutorial is macOS Monterey.
Step 2: Install Homebrew (If Not Already Installed)
Homebrew is a package manager that simplifies the installation of software on macOS. If you haven’t already installed Homebrew, you can do so by opening your Terminal and pasting the following command:
/bin/bash -c "$(curl -fsSL https://raw.githubusercontent.com/Homebrew/install/HEAD/install.sh)"Step 3: Update Homebrew and Tap PHP Once Homebrew is installed, update it to ensure you have the latest version of package definitions:
brew updateThen, tap the PHP formulae repository:
brew tap homebrew/coreStep 4: Choose a PHP Version
You can install different versions of PHP using Homebrew. For example, to install PHP 8.0, use the following command:
brew install [email protected]Replace 8.0 with the desired version number.
Step 5: Verify the Installation
After the installation is complete, verify that PHP was installed successfully by running:
php -vYou should see something similar to this:
PHP 8.0.28 (cli) (built: Feb 14 2023 15:55:13) ( NTS )
Copyright (c) The PHP Group
Zend Engine v4.0.28, Copyright (c) Zend Technologies
    with Zend OPcache v8.0.28, Copyright (c), by Zend Technologies
Step 8: Test a PHP File
To ensure that PHP is functioning accurately, follow these steps to create a basic PHP file and conduct a test. Begin by opening a text editor, and in tandem, establish a dedicated folder where you’ll store your PHP files. Within this folder, create a new file named “index.php” and proceed to input the subsequent code:
<?php

  phpinfo();

?>
Save the file and open your Terminal. Navigate to the folder where you saved the test.php file and run:
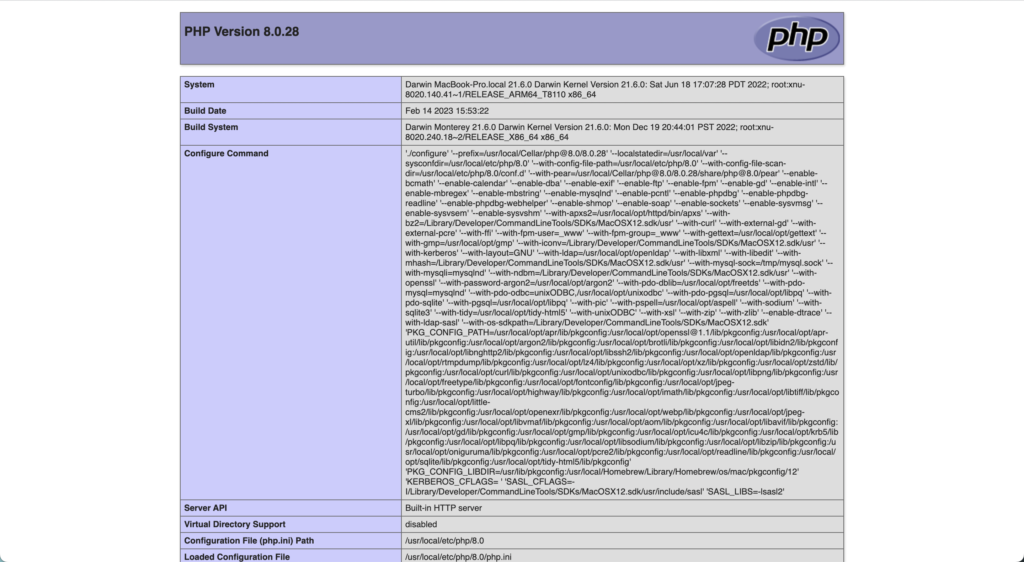
php -S localhost:8000Executing this command will initiate the PHP server on port 8000. Following that, you can open your web browser and navigate to http://localhost:8000. This should display a PHP info page in your browser similar to the image below.

Conclusion:
Congratulations! You’ve successfully installed PHP on your macOS machine using Homebrew. With PHP up and running, you’re ready to start developing and testing PHP applications locally. Enjoy coding!
